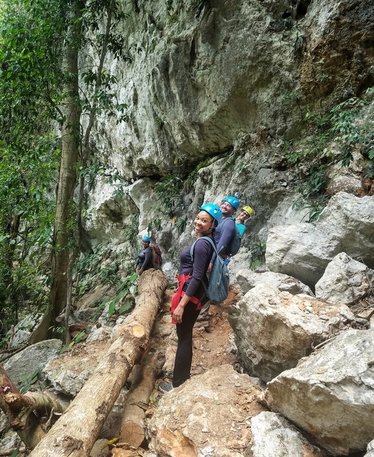
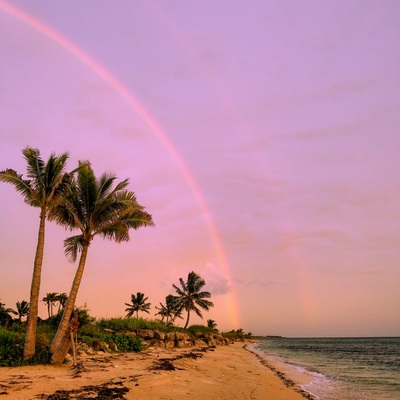
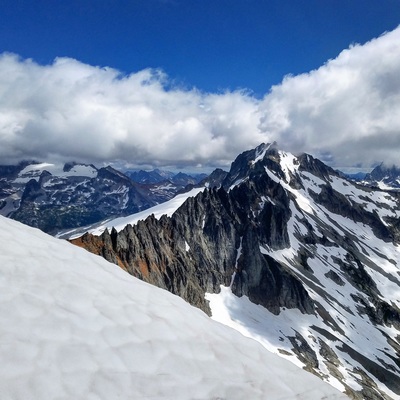
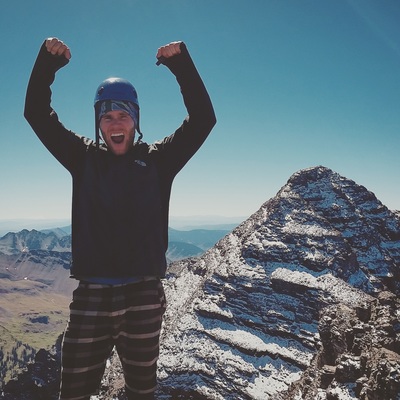
 Sinkhole hiking. Sinkhole hiking. So you’re not quite ready to don your squirrel suit or pick up your crampons and ice axe, but you’re in need of some adrenaline-inducing adventure? Try Belize. Belize is the ultimate weekend-warrior adventure hotspot. While lacking the towering volcanoes of its neighbors, Belize is packed with entry-level adventure. Caves, sinkholes, jungles, and barrier reefs. In the heart of Belize’s mountainous region lies San Ignacio, a town of almost 18,000. It’s Belize’s second-largest city, and a great launching pad for all kinds of outdoor activities. My friend Kachine and I spent three days in San Ignacio in May of 2017, determined to cram in as much as possible. We knew that many of San Ignacio’s adventure activities lay as far as an hour from town, so we rented a Renault SUV from Budget. After driving this marvel of automotive engineering for less than a day, the air conditioning went out in 100-degree heat, the battery died, and the trunk door started sloughing off parts. The real adventure turned out to be taking this pile of French crap on some of Belize’s roughest roads. 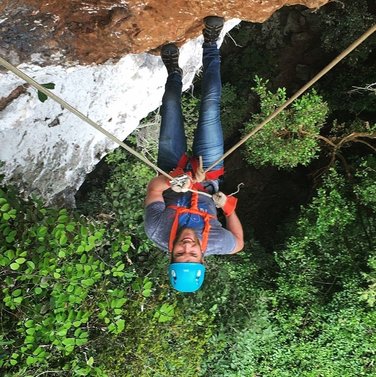 The Black Hole Drop. The Black Hole Drop. RAPPELLING INTO A 300-FOOT SINKHOLE Armed with the Hindenburg of cars, we set out to Ian Anderson’s Caves Branch, an adventure guiding company an hour from San Ignacio, to rappel down the Black Hole Drop. I’d rappelled before. Kachine had not. However, my rappelling experience paled in comparison to what lay before us. Our guides led us down a hilly, 45-minute path through the jungle, stopping to crack open coconuts and let us try various jungle herbs that came in varying degrees of delicious. Two quarts of sweat later, we arrived at the edge of an enormous sinkhole, the start of a huge underground cave system. Caves Branch also offers an overnight rappelling/caving adventure in this same cave system, but we’d opted for the day trip, so we threw on helmets, harnesses and webbing, and listened to a short safety briefing. Then, one by one, we lowered ourselves down, hearts pounding a little, walking horizontally down a 15-foot cliff at the top of the sinkhole. As the cliff gave way into an overhang, we kept descending into nothing, through the tops of 150-foot-tall trees growing out of the sinkhole floor below. Kachine lost a shoe in the process, yet still rocked it like a hurricane. At the bottom, we had a delicious lunch our guides had packed for us, then began the ascent back to the top via a system of ledges and ladders on the opposite side of the sinkhole. Upon reaching the top, we rested, took some pictures, then hiked back, sweaty, smiling, and satisfied. 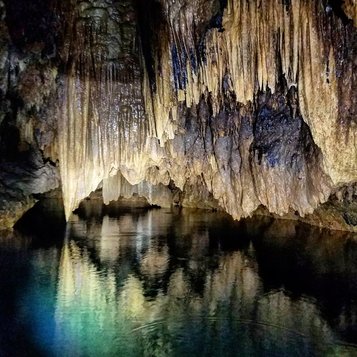 Stalagtites in Barton Creek Cave. Stalagtites in Barton Creek Cave. BARTON CREEK CAVE While planning our trip, we’d decided to explore ATM Cave, which doesn’t dispense money but rather stands for Actun Tunichil Muknal, and features tight passageways, underwater swimming and archaeological relics. After talking with locals, though, we opted to explore Barton Creek Cave instead, due in part to the fact that it features the most sheer natural beauty, and also due in part to the fact that ATM no longer allows cameras, thanks to a tourist who dropped his on a 2000-year-old skull. Nice work, dimbus. So, we headed for Barton Creek Cave, driving the last seven miles on an incredibly rough 4WD road to the visitor center, known as Mike’s Place. We bargained with our guide a bit to get the tour cost down to $50 apiece, then donned life jackets, grabbed a canoe at the mouth of the cave, and paddled in. Kachine manned (womanned?) the floodlight while I manned the camera, and our knowledgeable guide pointed out all kinds of interesting geological formations and archaeological relics as we paddled deeper and deeper into the expansive cave system. Finally, a kilometer deep, we reached a point where an unbelizeably gorgeous organ pipe stalagtites blocked further passage. We turned off all our lights, sitting in the resounding darkness and silence for several minutes, lost in the immensity of this place. Eventually, we turned the canoe around and headed back, in awe of Barton Creek Cave. 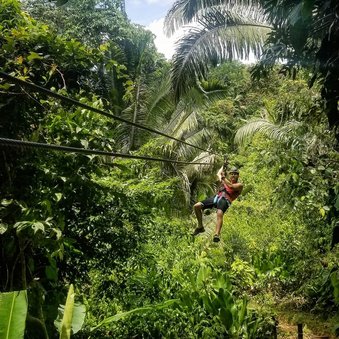 Ziplining at Bocawina. Ziplining at Bocawina. JUNGLE ZIPLINING. So you’ve ziplined before? So had I. I hadn’t, however, had my face brutally lacerated by a giant jungle tree at 30 mph until I ziplined in Belize. Okay, so it was a small scratch. But it bled with a vengeance worthy of a much larger wound. We chose to zipline at Mayflower Bocawina National Park, with a company called Bocawina Rainforest Resort and Adventures, which boasts a 2,300’ line. Depending on which billboard you believe, this line is either the longest zipline in Belize or the longest in Central America. However, if you’re looking to stay closer to San Ignacio, plenty of more accessible zipline and aerial adventure parks are available, including a course at Mike’s Place. Upon arrival, we met our hilarious guides, both named Victor, who suited us up and led us on a hike up to the first of nine lines. As we progressed through the 2.5-mile course, the lines got faster and longer, and the Victors kept us laughing the entire time. They may or may not have let us try some borderline illegal maneuvers, something which I will neither confirm nor deny. During the final, record-breaking line, the aforementioned malevolent tree reached out and hurt my moneymaker. Wiping away blood, I stood on the final platform, hoping this cut would scar, because let’s face it, it would make a pretty cool story. 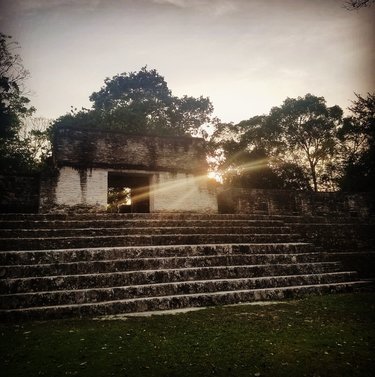 Sunset at Cahal Pech. Sunset at Cahal Pech. SAN IGNACIO PROPER. San Ignacio itself is a pretty cool town, boasting a vibe and culture different from Belize’s other major cities. Ignore recommendations to stay away from downtown and head for the casino; we spent two nights on Burns Avenue, a walkable street replete with restaurants, bars and shops, and met amazing locals and tourists alike. The Mayan ruins of Cahal Pech are a mere mile away from the city center and are definitely worth exploring, although they pale in comparison to other, larger ruins nearby, such as Tikal and Xunantunich. We went at sunset and essentially had the ruins to ourselves. You’re allowed to climb to the top of all the pyramids here, so naturally, we did. Accommodations are plentiful and diverse in San Ignacio. We stayed at Midas Resort, which lies just outside of town and features a variety of cabanas and cottages, for two nights, and at the uber-eco-touristy Black Rock Lodge another. Black Rock, set in the mountains 30 minutes from San Ignacio, boasts an array of attractions itself, and while there we mountain biked and hiked to the small, yet picturesque, Vaca Falls. Black Rock’s location, service, and food are unparalleled in San Ignacio, in my opinion, and you can even flush your toilet paper down the toilet here. If air conditioning is a must-have, though, you won’t find it at this environmentally conscious resort. Only have three days? Check out my three favorite adventure attractions. Or, follow a different itinerary entirely. Literally hundreds of other attractions are within striking distance of San Ignacio. You can check out several large nature reserves, explore hordes of other caves, visit the Inland Blue Hole and its surrounding national park, and much more. Or, you could stay home, sit on your couch, and watch Netflix. The choice is yours.
20 Comments
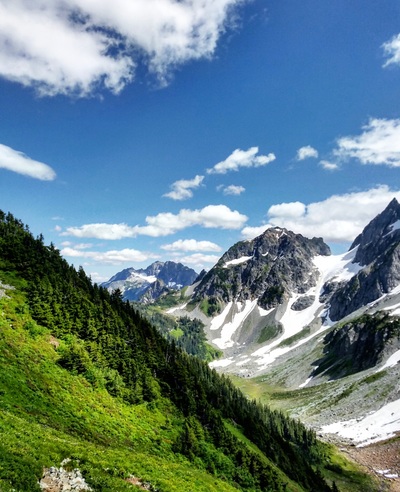
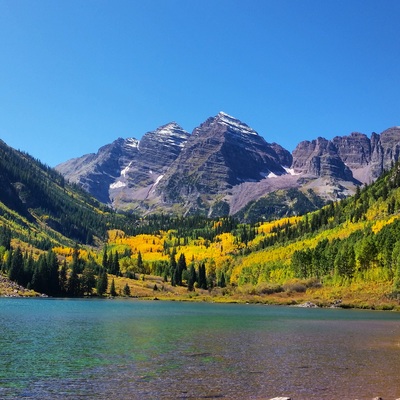
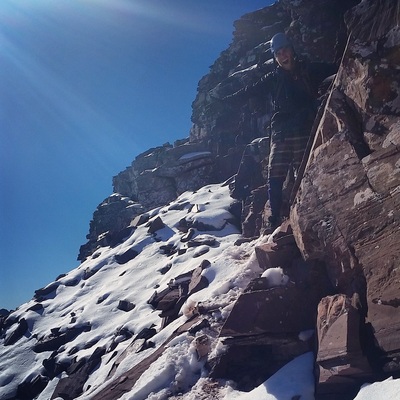
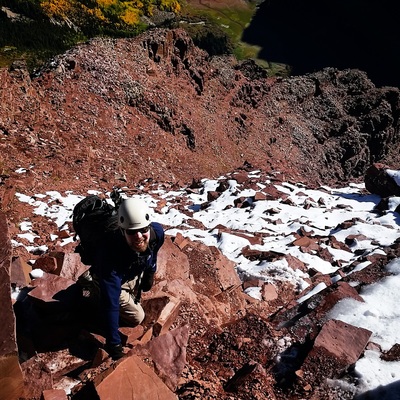
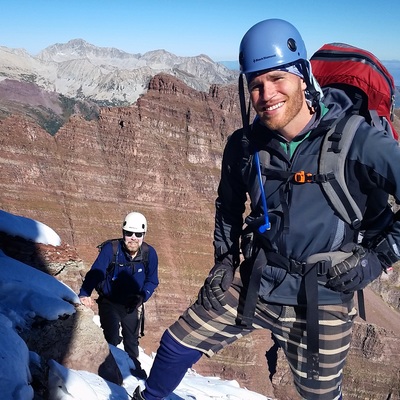
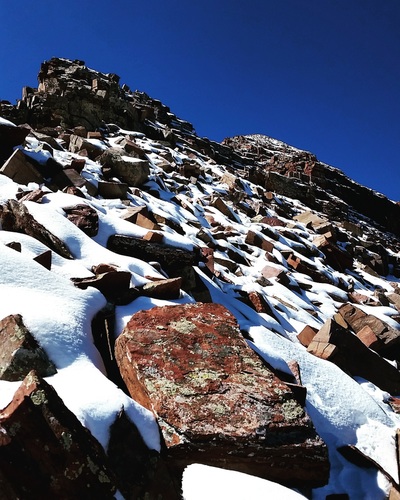
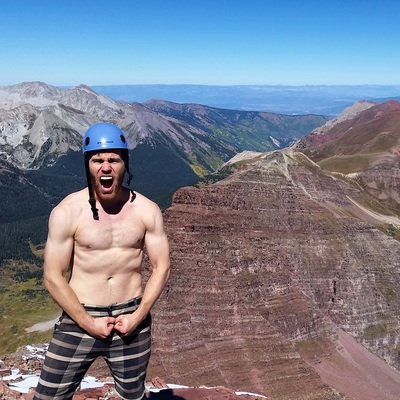
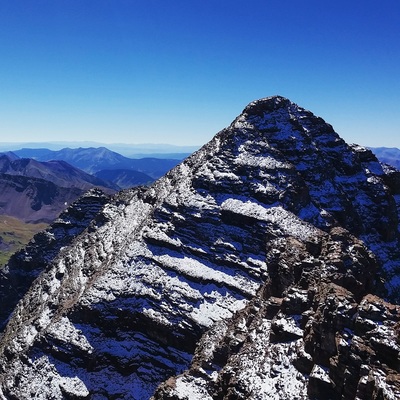
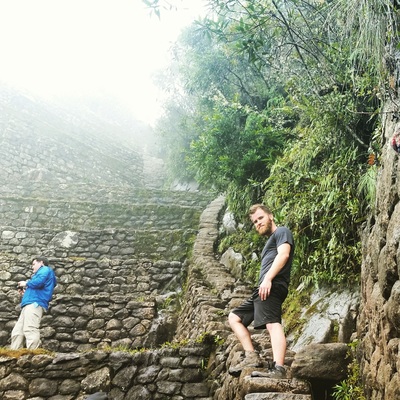
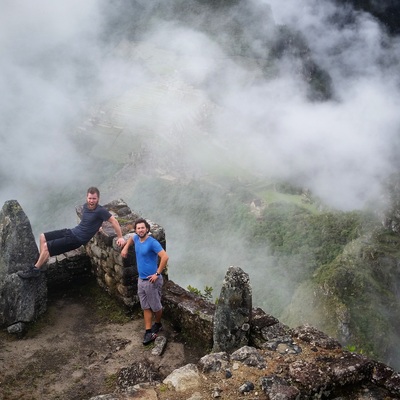
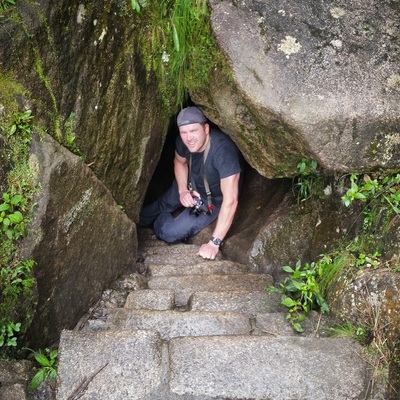
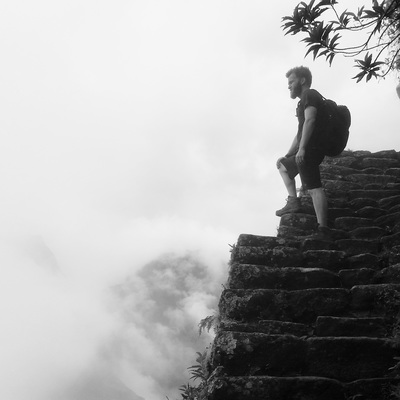
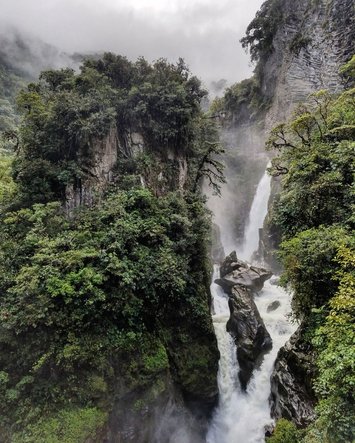 Pailón del Diablo. Pailón del Diablo. Baños is the undisputed outdoor adventure capital of Ecuador. Whitewater rafting. Ziplining. Canyoning. Mountaineering. Mountain biking. Oh, and a swing at the end of the world. You want it? Baños has it. Adrenaline on tap. In February, my good friend Brad and I spent two days in Baños with the goal of keeping our heart rates up, our palms sweaty, and our knees weak like Mom’s spaghetti. Those will be the only Eminem lyrics referenced in this article. Promise. We drove in late at night, checking into the first hotel we found. Why didn’t we opt for a hostel, you ask? Well, after my last trip to Peru, and after two nights of staying in a dorm room with loudly copulating people right across the hall from a nightclub that popped off until 4 am, I realized that I’m not seventeen anymore. We needed our rest, as we planned to pack a lot into two days. What follows are the three activities I think you absolutely can’t miss when in Baños. 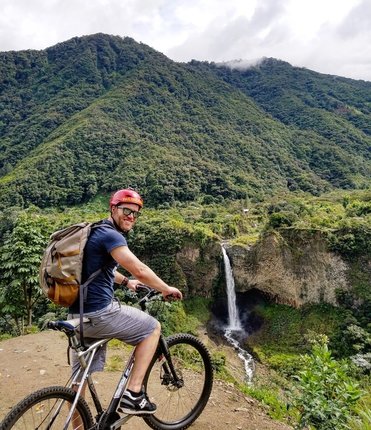 The ride. The ride. CHASING WATERFALLS Waking up early (by our standards), we disregarded TLC’s advice and headed for one of Baños’ main attractions: the Ruta de las Cascadas, or Trail of the Waterfalls. We rented bikes for $7 apiece at one of Baños’ many adventure outfitters, and were given helmets and rain jackets and a crude map, and sent on our way. Brad and I rode through the city for a kilometer or two, gradually angling towards the Trail of the Waterfalls. Our bikes were most likely last serviced during World War II, and we quickly found that rain, flip-flops and a lack of clipless pedals go together about as well as Donald Trump and Angela Merkel. Soon, we saw a sign for our first quarry: Cascada de Ulba. We paid the trailhead attendant a dollar apiece, ditched our bikes, and hiked a half-mile or so along a riverbank to the base of the thundering waterfall. Due to heavy rains the night before, Cascada de Ulba was in peak form, and we spent a half hour walking over slippery, moss-covered rocks and logs soaking in its majesty. Back on our bikes, we stopped to gawk at several other waterfalls along the way, including Cascada de Agoyan and Manto de la Novia, both of which were located across a large canyon that the Pastaza River had carved out. Soon, the clouds, which heretofore had only been sprinkling, opened up, and a torrential downpour began. Needless to say, mudflaps would’ve been a good choice, as the murky road produced some impressive skid marks on my shorts. Well, actually the shorts I’d borrowed from Brad. Sorry, Brad. Finally, we reached the last stop on our fifteen-kilometer ride, the waterfall which every guidebook said was the star of the show: Pailón del Diablo. We’d heard rumors of Pailón del Diablo’s impressive flow, but being the waterfall snobs from Oregon that we are, we didn’t expect anything we hadn’t seen before. We were wrong. 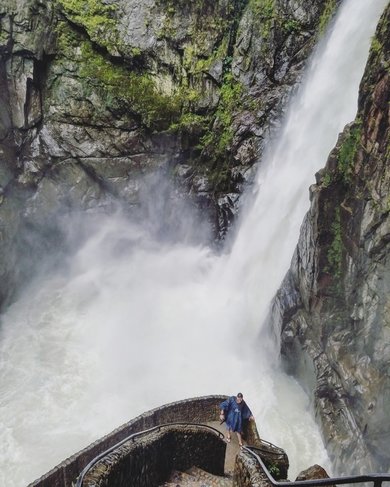 The Cauldron. The Cauldron. Pailón del Diablo is no ordinary waterfall. 50 or so meters of Niagara-like flow condensed into a narrow channel, thundering into a boiling pool, complete with treacherous steps that take you down into the cauldron itself? Yes please. We paid a nominal entrance fee and hiked a kilometer or so to the entrance to the falls. First, we climbed narrow, steep, stone steps that literally clung to the side of a cliff, steps that took us down into the Devil’s Cauldron itself. After getting sufficiently soaked by the spray of the thundering waterfall mere meters from us, we climbed up Grieta al Cielo, a narrow crack in the rock behind the cascada that requires you to crawl on all fours at times and perform some basic rock climbing moves at others, but affords you a vista of the backside of Pailón del Diablo, so close you could reach out and touch it (although I definitely wouldn’t recommend this unless you have a good life insurance policy, with Jon Davidson listed as the primary beneficiary). Finally, after grabbing a cheap beer at the waterfall’s cafe and gift shop, we walked across a rickety suspension bridge to take in the whole dramatic chasm from a different vantage point. Plan on spending a couple hours at this waterfall, enjoying it from its many awe-inspiring angles. One can take the Ruta all the way to Puyo, some sixty kilometers from Baños, viewing more waterfalls along the way. But, soaked and tired, we opted to call it a day. Back at the entrance to Pailón del Diablo, we and our bikes caught a cheap bus back to town. 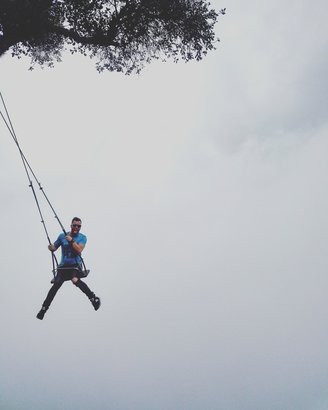 The Swing. The Swing. THE SWING AT THE END OF THE WORLD 2,600 meters above sea level, high above the valley in which Baños lies, there’s a swing. It hangs from a treehouse at the edge of a cliff. You’ve probably seen it on Instagram. It’s called the Swing at the End of the World. You can hike, bike or drive up to Casa del Arbol, where this swing resides. We drove, because America. Upon arrival, Brad, myself, and our new friend Nat took some practice swings on a nearby, lower set of swings, and navigated a crude zipline, all the while waiting in line for The Swing. Finally, our turn came, as did the rain. We strapped in using a single chain, because safety and stuff. A guy standing nearby had designated himself as the de facto swing pusher, so he gave us a shove and we were off, soaring above the steep slope below, taking in sweeping views of…dreary grey clouds. We’re told that on a clear day, this swing affords unmatchable views of Tungurahua Volcano. Today was not that day. Full disclosure: this swing is nowhere near as scary as pictures might make it look. You don’t swing out over a cliff, but rather a very steep, grassy slope, although a fall would still mean a serious injury. Still, The Swing is definitely worth the trip, if for the gravity-defying photos alone. 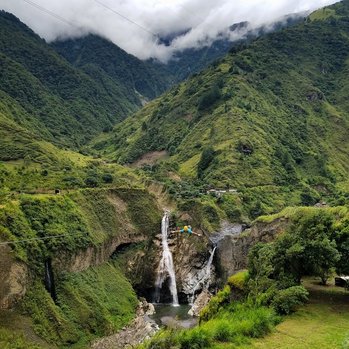 Coming in hot. Coming in hot. ZIPLINING OVER A WATERFALL Ziplining companies exist in droves in Baños. You can zipline through towering forest canopies or across gaping canyons. While chasing waterfalls the day before, we’d spotted a zipline at Cascada de Agoyan, right off the main highway, that took you directly over the Ecuadorian Andes’ tallest waterfall. We didn’t have any cash on us, so we vowed to return the following day, dollars in hand. For only $15 apiece, Brad and I strapped on helmets and harnesses, climbed a tower, and were shoved off, soaring above the canyon below. We opted for the Superman pose, face down with arms outstretched, looking down at eagles and condors flying below us. At the other side of the canyon, we passed directly over Cascada de Agoyan’s 61-meter, two-forked plunge, and ended up on a rocky hillside. We hiked up a few hundred meters, then did the whole thing again in reverse. What The Swing lacked in adrenaline, The Line more than made up for. _ _ _ Beyond the attractions I’ve described here, Baños is replete with scores of other worthwhile activities, like whitewater rafting, kayaking, canyoning, rappelling, mountain climbing, bungee jumping, soaking in mineral baths, and more. Yes, its name means bathroom in Spanish, and yes, there’s a town called Guano nearby. But that’s the only crappy thing about this mountain town. If adventure in Ecuador is what you seek, Baños is where you should seek it. Phuket. You might know it as Thailand’s largest island, or as a southern Thai province. You might know it as a rainforested, mountainous region, or as a beachgoer’s delight. If you’ve been there, you might know it as paradise. In November of 2016, three friends and I spent five days in Phuket. Pro tip: Five days were not enough. After four days and nights in bustling Bangkok, we were ready for a change of scenery. Bangkok, while an amazing city in its own right, obviously didn’t provide much of the natural beauty we knew Thailand was famous for. So, we hopped on a plane for the short 90-minute flight to Phuket’s only airport. Upon arrival, we took a bus to our hotel in Kamala Bay, ready for some fun in the sun. Unfortunately, it was pouring rain. This monsoon quickly passed, though, as we learned that the weather in Phuket changes more often than Donald Trump’s position on any given issue. What followed was merely the vacation of a lifetime. So, without further ado, here are my five must-do activities and attractions in Phuket. 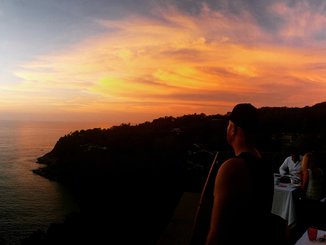 The view from Diavolo. The view from Diavolo. CHASING SUNSETS. Since we were staying at a hotel on Phuket’s west coast, right on the beach in Kamala Bay, we didn’t have to go far or wait long to take in some astounding sunsets, starting with a jaw-dropper from our infinity pool the very first night. However, since we had a rental car at our disposal, we decided to incorporate some variety into our nightly sunset chase. Quite a few restaurants offer amazing sunset views. Of these, I would recommend Wassa Homemade Bar, Diavolo, and Joe’s Downstairs, all of which feature great menus, upscale atmospheres and stunning sunset views. We didn’t have a chance to check out Baba Nest, but from everything we heard, it deserves its place in most lists of the world’s most beautiful rooftop bars. Looking to take in the end of the day on a beach rather than at a restaurant? You really can’t go wrong with most of the beaches on Phuket’s west coast. Of these, I would recommend Kata, Bang Tao, and the beach in our own backyard, Kamala. Wherever you choose to take in your first Phuket sunset, have your smartphone or camera ready. Phuket will not disappoint. 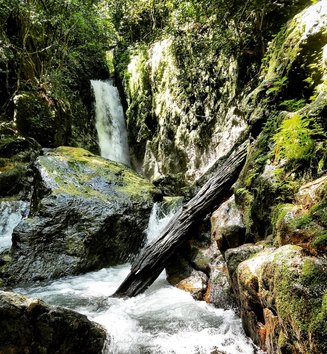 Bang Pae Waterfall. Bang Pae Waterfall. HIKING. Phuket, while mountainous, isn’t home to as many world-class hiking trails as are other parts of Thailand. Still, we found enough natural beauty to satisfy all but the most dispassionate soul. Our two favorite trails were both suitable for novice hikers, yet provided a significant amount of bang for your buck (or bang for your baht, should I say). First, we hiked the short trail to Phuket’s tallest waterfall, Bang Pae. While small by Oregon standards, this 10-meter-tall cascade features mossy cliffs and a nifty scramble to its base. We also stopped by the Gibbon Rehabilitation Project Center along the way, spoke with a volunteer, and learned the stories of several of the center’s more gregarious gibbons. Once reaching the waterfall at the end of the 500-meter trail, we thought about jumping in, but quickly realized the water itself was quite warm and wouldn’t provide us much relief from the drenching humidity. We stood and took in the beauty that surrounded us, from the thick rainforest to the mossy rocks, from rocky pools below to the waterfall in front of us. We scrambled down a rocky cliff and along a ledge to the base of the falls itself, snapped a few photos, and headed back. 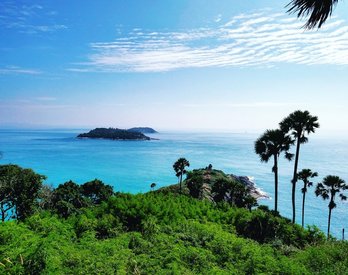 Phromthep Cape. Phromthep Cape. Second, we headed for Phuket’s southernmost point, Phromthep Cape. While a renowned sunset-watching spot, we arrived at the Cape in the middle of the day. We parked and paid to use a toilet that featured cesspools of brackish water on the ground. Ignoring the diseases we’d probably just contracted, we headed to the top of a hill, past a large display of golden elephants, to a lookout, probably 300 meters above the ocean, featuring one of the most astonishing views of tropical paradise I’d ever seen. Miles of turquoise ocean stretched out in front of us, punctuated by lush, mountainous islands. A trail stretched before us, leading down to the water itself. We headed partway down this trail, but after taking into account the midday sun, stifling humidity, and our lack of water, declined to go all the way to the ocean, deciding instead to turn around and find some air conditioning and a cold beverage. Heatstroke was not a part of our agenda for the day. However far you get on this trail, you’ll be rewarded with ever-changing, astonishing vistas. 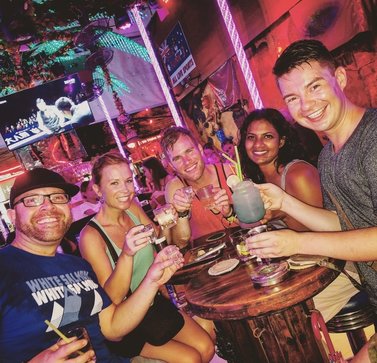 Bangla Walking Street. Bangla Walking Street. BANGLA WALKING STREET. Patong, Phuket’s entertainment capital, features a street that makes the Vegas Strip and Bourbon Street seem like they’re for toddlers. It’s called Bangla Walking Street. Want a ladyboy show? A Ping-Pong show (Google it)? A massage with a happy ending? Public nudity? You’re at the right place. Want to avoid the seedy underbelly of Phuket, yet have a good time? Bangla is replete with karaoke bars, insanely cheap drink deals, Connect Four hustlers (really), and so much more. We ended up here four nights in a row. Since Thailand’s beloved king had recently died, Bangla shut down early every night to pay homage and respect. By early, I mean 3:30 AM instead of 5. Needless to say, numerous shenanigans took place each night before closing time. RENTING A CAR. Since we wanted to see the entire island, we decided that renting a car for a couple days made the most sense, rather than trusting our lives to thoroughly intoxicated tuk-tuk (three-wheeled pedicab) drivers. So, after some haggling and miscommunication at the local travel agency, a third party drove down with our new ride. I’d driven on the left side of the road before. I’d never sat on the right side of the car before. With a little mental focus, I managed to stay on the correct side of the road, but may or may not have turned on my wipers while trying to use my turn signal at least 50 percent of the time. With the exception of getting pulled over by phony cops and extorted for money, our overall experience with renting a car made it something I’d definitely recommend in Phuket. We drove the entire perimeter of the island, stopping at fantastic beaches, temples, and marketplaces along the way. Only once, at a roundabout in Old Phuket City, did the absolute mayhem that is Thailand traffic actually stress me out a bit. 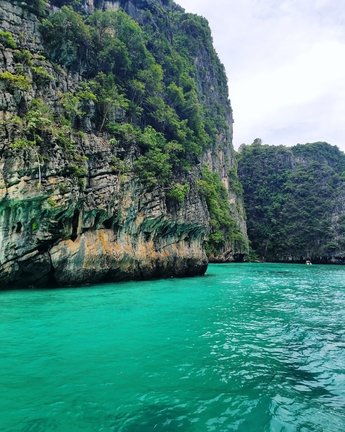 Ko Phi Phi Leh. Ko Phi Phi Leh. PHI PHI ISLANDS. Phuket is ringed with scores of stunningly beautiful tropical islands. Of these, the Phi Phi Islands are arguably the most picturesque. Pronounced “Pee-Pee” (really), this group of two major and six smaller islands are technically part of Thailand’s Krabi Province, but are easily accessible via a 60-minute boat ride from Phuket. Numerous guided tours and ferries are available daily, but we opted to charter a private boat, allowing us to explore at our own pace away from the teeming tourist masses. Simply put, the Phi Phi Islands are extraordinarily beautiful. Green, forested limestone cliffs jutting out of an aquamarine sea. Monkeys that drink Red Bull. White sand beaches. Secluded, cliff-ringed coves. We came. We saw. We swam. We snorkeled amongst hundreds of brightly colored tropical fish of all shapes and sizes, so close you could reach out and pet one, or smuggle it home. After eating lunch on the beach, we swam out between longtail boats at Maya Bay on Ko Phi Phi Leh, the beach featured in the aptly named movie The Beach. We marveled at inhabited cave structures clinging to cliffsides. Time flew by and darkness beckoned, so we hopped back in our private boat for the choppy ride home. We all agreed that next time we were in Phuket, we’d spend a night or two at one of Phi Phi’s several resorts, because the magic of these islands had gripped our souls. - - - Got only five days in Phuket? That’s one activity a day. You got this. Of course, there are countless other Phuket attractions worth checking out, as well. From iconic temples to giant Buddhas, from cultural theme parks to old-world markets, from scuba diving to James Bond Island, there’s something for just about everybody. In short, Phuket is not a destination that you want to take a power tourism approach with. It’s a rich, diverse, beautiful, fun island that is worth taking the time to explore in depth. Ready, set, Phuket. 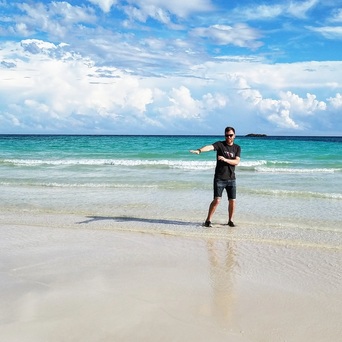 Gold Rock Beach Gold Rock Beach There are two good times to go to the Bahamas. Whenever, and anytime. However, when you think of world-class international hiking destinations, The Bahamas probably don’t immediately come to mind, and for good reason. The Bahamas are world-renowned for beaches and palm trees, not trails and mountains. If you’re heading to The Bahamas and you want to do more than sip sugary-sweet cocktails poolside, though, all is not lost. In early October 2016, Jennifer and I visited Grand Bahama Island. We opted to rent a car, since we both prefer adventures over siestas. We landed at Freeport’s tiny international airport after a harrowingly turbulent flight from Miami, and hopped in our Mercury Milan, courtesy of Brad’s Car Rentals. Adventure time? Not so fast. After 15 minutes of driving, our car’s low tire pressure light came on. We also noticed that our license plate was hanging by a thread, and the whole car reeked of cigarettes and shame. After meeting gold-chain-clad Bad Brad himself and swapping our ride out for a much more reliable Nissan Sentra, we hit the road, anxious to explore this gorgeous, tropical island. Grand Bahama Island is home to three national parks, with two more in the process of being established. Lucayan National Park, 25 miles east of Freeport, is described on various tourism sites as the crown jewel of Grand Bahama natural beauty. It’s the only place on the island where one can see all six of the island’s ecosystems in one location. We figured this would be a good place to start. We arrived at the dirt-road entrance to Lucayan, and realized that national parks in the Bahamas are not quite what they are in the United States. A very sweaty man behind a folding table in a dusty parking lot greeted us, and informed us that Lucayan doesn’t accept credit cards. So, after driving back into town to find an ATM, we returned, cash in hand, to explore the 40-acre national park. 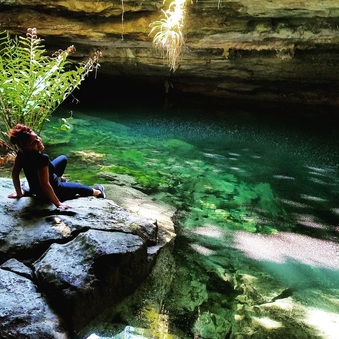 Ben's Cave Ben's Cave First, we headed north from the entrance on a 15-minute trail to explore a series of caves. Descending a staircase into the first cave, Ben’s Cave, we witnessed stalactites, schools of fish, and eerily calm blue-green water. Jennifer took an accidental seat here on the slippery limestone. This inland blue hole is connected to the ocean, so the water is a mixture of fresh and salt. Ben’s Cave is one of the longest surveyed cave systems in the world. Diving expedition packages are available from various outfitters. We then attempted to find the second cave, Burial Mound Cave, where bones of Lucayan natives have been found, but instead were met with an army of enormous spiders, which was enough to turn us back around. Back at the welcome center, we crossed the highway and headed for the other half of the national park. We crossed boardwalks leading through dense mangrove swamps, crested some small sand dunes, and arrived at Gold Rock Beach. Known for its “Welcome Mat,” a series of unique tidal pools and sand ripples visible at low tide, Gold Rock is arguably Grand Bahama Island’s most beautiful beach. Featuring stunning white sand that stretches for miles in either direction, Gold Rock is one of the most picturesque beaches I’ve ever had the privilege of sinking my toes into, and a must-see for any Bahamian tourist. If you’re a movie buff, you might be impressed by the fact that several scenes from Pirates of the Caribbean were filmed here, too. We took the loop trail back through more swampland, stopping to admire a slew of different birds along the way. From Lucayan, we continued to head east, stopping to explore some beaches and rock outcroppings near High Rock. We heard rumors of a waterfall in Freeport’s Garden of the Groves, but after Googling images of the two-foot-tall cascade, we opted to skip it, and decided to explore more beaches instead. 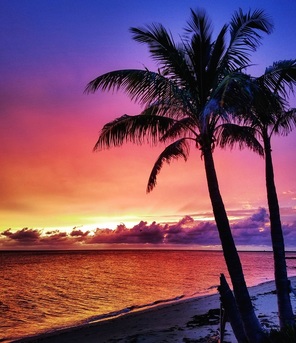 A sunset at West End A sunset at West End While it’s not hiking in the traditional sense, some of the best scenery on Grand Bahama Island can be found simply by parking at a beach, any beach, and just wandering. We chose to spend very little time at touristy destinations like Taino Beach, and instead found hidden gems at places like Barbary Beach, Peterson Beach, Bahama Beach, and more. We caught one of the most spectacular rainbow-laden sunsets in the history of mankind after doing a little trespassing and finding a supremely secluded beach at West End. We kayaked around Deadman’s Reef at Paradise Cove. We witnessed a shark feeding. We sipped mediocre beer and adult Capri-Suns. We made it out on the penultimate flight before Hurricane Matthew hit. We had, overall, an amazing time. Visiting Grand Bahama Island? There’s no need to bring your trekking poles and Camelbaks, but I encourage you to do more than just lay by the pool at your resort. Grand Bahama has a variety of natural wonders waiting to be explored. Only have time for one excursion outside of the city? Hit Lucayan National Park. Have time for more? Explore beaches on all sides of the island, and maybe even fit in a diving tour at Lucayan or at East End, something we’ll definitely be doing on our next visit. Step One: Go to Grand Bahama Island. Step Two: Explore. Step Three: Enjoy and repeat. 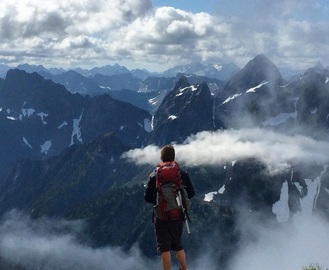 North Cascades views for days. North Cascades views for days. Have you always wanted to climb a mountain? Sorry, Portland residents. Just because it has "mount" in the name doesn’t mean Mt. Tabor qualifies. I’m talking about a bona fide mountain, with glaciers and rock climbing and marmots and such. Want a taste of what such a mountain is like without quivering in your Salomons and fearing for your life the entire way? Then, my adventurous friend, Washington’s Sahale Mountain is for you. At 8,681', Sahale is no Everest. But, to reach its summit, you need to climb over 5,200 feet, a larger elevation gain than is required on many Colorado Fourteeners. Sahale boasts a glacier climb, an exciting Class 4 summit scramble, and absolutely astounding 360-degree views of the heart of the North Cascade Range. To paraphrase renowned mountaineer Gerry Roach, it’s “always interesting but never desperate.” At the end of July 2016, two friends of mine and I set out for Sahale. We camped in a very unusual, privately-run, Trailer Park Boys-esque campground in Marblemount, WA the night before, then woke up around 4:30 AM to drive to Sahale’s trailhead. We reached the end of the road just about the time the sun would have been coming up. Unfortunately, the surrounding peaks and valleys were completely socked in with clouds, so we had to wait patiently for the dramatic views the mountain promised. After 3.7 miles of easy, gently ascending trail, we reached Cascade Pass, and took a left on the Sahale Arm trail. Still in the clouds, the trail got steeper and rockier, switchbacking its way to the top of the Sahale Arm. The Sahale Arm is a giant, gentle, long, serpentine ridge leading from the valley below directly towards Sahale’s upper slopes. At the top of the arm, the clouds broke for the first time, offering us obscenely gorgeous views of peaks like Bonanza Peak, Mount Formidable, and Glacier Peak. From here, the route leads directly onto the Sahale Glacier. We contemplated putting on our crampons, but quickly realized that the snow was soft and slushy. So, we opted to carefully dig in with our boots as we ascended the steep snow slope. Although we passed several roped-up teams of climbers, we decided to take our chances with crevasses and climb the glacier unroped. We only saw two visible crevasses, and were able to easily circumnavigate them. After the initial incline abated, we made a long, sweeping glacier traverse, exiting the top of the glacier close to Sahale’s sharp summit horn. 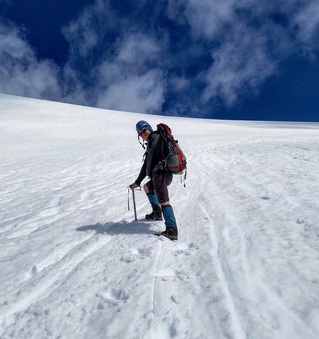 The Sahale Glacier. The Sahale Glacier. Pressing on, we climbed ever-steepening orange rock, crossed another small snowfield, and ditched our packs at the base of Sahale’s summit block. We’d read wildly disparate reports on the difficulty of scrambling required to climb Sahale, ranging everywhere from Class 3 to low Class 5. After climbing it, I would, in my unprofessional opinion, say that the majority of the summit block climb is Class 3, with about 20 feet of Class 4 climbing right at the top. The route corkscrewed around the summit, and we traversed some delightfully solid Class 3 ledges to reach a Class 4 exit crack leading directly to a notch in Sahale’s summit rocks. We made a couple challenging Class 4 moves in the notch, then popped out onto Sahale’s tiny summit. Upon arrival, we were struck by two things: the insane beauty all around us, and the fact that someone had lugged a watermelon up to the summit, leaving half of it on a rock. The summit itself is probably the most exposed part of the entire climb. There’s barely room for three people on its jagged rocks. We snapped pictures of nearby Boston Peak, as well as the innumerable Cascade summits around us. We high-fived. I took my shirt off. Then, we turned around to head home. 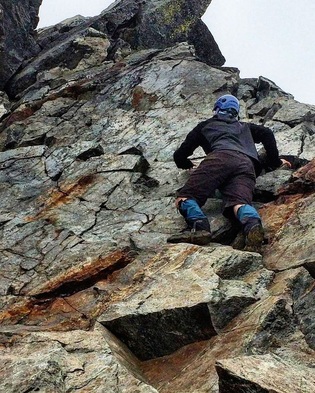 Climbing the Class 4 crux. Climbing the Class 4 crux. Downclimbing the Class 4 notch and crack proved to be the spiciest part of the climb. Once down off Sahale’s summit block, it was smooth sailing all the way back to the car. The clouds had opened up, affording us the views we’d missed out on on the way up, so we stopped to snap pictures virtually every other minute or so. The Sahale Arm proved to be even more gorgeous in the sunlight, as we walked the airy, alpine ridge through fields of vibrant wildflowers. Finally, some 15 or 16 miles later, we arrived back at the trailhead, and piled back in the car to make the long drive back to civilization. While Sahale may lack the elevation, technical difficulty, or name recognition of some of its neighboring peaks, I couldn’t recommend this mountain more. It offers unparalleled views, a diversity of ecosystems, and a thrilling summit. It will leave you breathless, and not just because you’re out of shape. Live in the Northwest? Go climb it immediately. Like, right now. 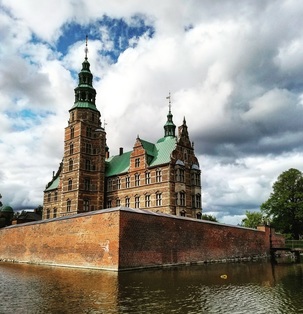 Rosenborg Castle Rosenborg Castle Perhaps I should actually retitle this blog post as Copenhagen, From A Dummy. I am said dummy. Why? Well, for a lot of reasons. But, without delving into my personal life, I’ll stick to the facts at hand. Copenhagen is an amazing city. One that, inexplicably, I decided to spend only a single day and night in. That, my friends and foes, is simply not enough time. This last May, I visited Scandinavia for the first time. My delayed United flight put me in Oslo two hours behind schedule, thereby causing me to miss my flight to Copenhagen. All other flights were booked for the next two days. So, I did the American thing and rented a car. And drove. And drove. Ten hours of awful traffic and construction later, I arrived in Denmark’s largest city. After consulting TripAdvisor and Instagram, I embarked on a whirlwind tour of all the must-see spots the city had to offer. I started off at the Rosenborg Castle. Imposing yet beautiful, and located on the grounds of a large, lush park, this landmark is a must-see. I wandered around, got hissed at by a swan, and soaked in the spring sunshine. Next, I headed to Copenhagen's iconic Little Mermaid statue, located on the waterfront at the Langelinie Promenade. Sculpted by Edvard Erikson and completed in 1913, it’s Denmark’s most photographed statue and near the top of most Copenhagen to-do lists. To be honest, I was somewhat underwhelmed. The crowds of gawking selfie-drunk tourists made it tough to even get an unobstructed picture of this work of art. Short on time? I would recommend the nearby St. Alban’s Church and Gefion Fountain. What they lack in international renown, they make up for in sheer scale and architectural beauty. St. Alban’s Church looks like something straight out of a movie, and the fountain and accompanying goddess statue are complex and riveting, complete with a stunningly blue pool. 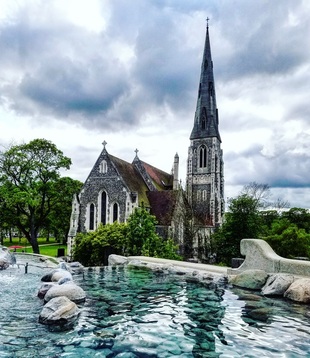 St. Alban's Church St. Alban's Church I made a brief stop at the Ny Carlsberg Glyptotek Museum, a picturesque tribute to all things art. Mostly, I just wanted to utilize the museum’s free wi-fi to plan the rest of my attack, but I found that although I’m not much of a museum aficionado, this one was a worthy destination. I would’ve spent more time here had I had more time here. Of course, no visit to Copenhagen is complete without a stop at the ubiquitously seminal Nyhavn, a 17th century waterfront, canal and entertainment district. Go. Walk around. Snap a picture. Post it on Instagram. Everyone’s doing it. Copenhagen is also known for its thriving craft beer scene. I’d had plenty of brews from Danish pioneers Mikkeller over the years, so I made it a point to visit their brewery. Unbeknownst to me, Mikkeller actually owns and operates multiple taprooms and bottle shops around town. I happened upon the one that was closed on a Friday, which seemed like a questionable business practice to me. Finally finding a location that was open, I went in and enjoyed an 18% ABV barrel-aged blueberry sour and struck up conversations with locals and tourists alike in this tiny, crowded bar. It turned out that coincidentally, or perhaps providentially, I’d visited Copenhagen during the citywide, Mikkeller-hosted Copenhagen Beer Celebration, one of the largest craft beer festivals in northern Europe. I had unknowingly just walked into the afterparty. After visiting several other Mikkeller-operated taprooms, the rest of my tourist plans were derailed, but I thoroughly enjoyed making friends with some amazing people and drinking some amazing craft beer. In the morning, after staying up way too late, I woke up way too early to begin the drive back towards Gothenburg and Oslo, kicking myself for not spending more time in this capital of cool. Visit Copenhagen. Take my tourist advice, or don’t. But by all means, don’t be a dummy. Spend more time there than I did.  When you think of the Greek island of Santorini, romantic images of sun-drenched white villas on a cliffside undoubtedly come to mind. Hot tubs. Wine bars. Sunsets. What you may not know, though, is that Santorini is quite the hiking destination in its own right. Santorini is not an island, but rather a group of six islands that together comprise an enormous volcanic caldera. Thira, the largest and most populous of Santorini's islands, features the majority of Santorini's population and tourist attractions. In March of 2016, some friends and I visited Santorini. Along with visiting the usual tourist spots, such as Oia, Ammoudi Bay, and Akrotiri, as well as hitting up Santorini Brewing Company and numerous restaurants and cafes, I made it my mission to seek out the best hikes on the archipelago. Though in Month 9 of my ongoing battle with Lyme Disease, I thankfully felt good enough while in Greece to conquer some short hikes. Featuring soaring cliffs, black and red sand beaches, and an active volcanic cone, Santorini is a little-known hiker's paradise. Depending on how you define a hike, some would argue that the best hike on Santorini is the trek from Fira to Oia along the caldera's rim. Since much of this hike takes place on roads and alleys, I've decided to leave it out of this article. Plus, I didn't have a chance to hike it myself. However, from everything I've heard, it's still very much worth checking out if you have 4 or so hours to spare. Without further ado, here are my three favorite hikes on Santorini. 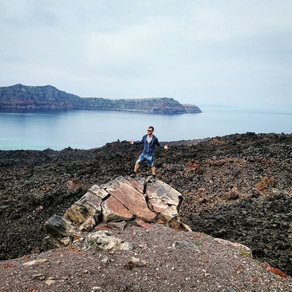 1. NEA KAMENI AND PALEA KAMENI These two volcanic islands lie at the center of Santorini's caldera, and remain active to this day. They feature stunning views of Santorini's islands, hot springs, volcanic steam vents, and incredible geology. Early one morning, I grabbed a $25 island ferry from Fira's Old Port. After crossing the caldera's deep blue waters, we disembarked at Nea Kameni, and headed up the dusty hiking trail to the highest point on the island. Along the way, we passed several volcanic craters, including one that was actively steaming sulfuric gas from multiple vents. At the top, we took in the dramatic 360-degree views while our tour guide filled us in on Santorini's destructive volcanic history. I climbed a couple of rocks and a concrete post to get to the island's true highest point, of course. After heading back to our boat, we circumnavigated Nea Kameni to a bay on Palea Kameni, the older of the two cones. Myself and a couple other brave souls jumped out of the boat and swam 40 meters through freezing Aegean waters to reach Palea Kameni's hot springs. These springs were the only real letdown of this tour and hike. Our tour guide assured us that they were as close to paradise as one could get. They were not. Muddy, tepid and full of seaweed, these "hot" springs barely passed as lukewarm, and their red clay forever stained my shorts. Wild goats roamed nearby, and I swear they were laughing at me. After swimming back to the boat and barely eluding hypothermia, we made the short trip back to Fira. Do the hike. Skip the swim. 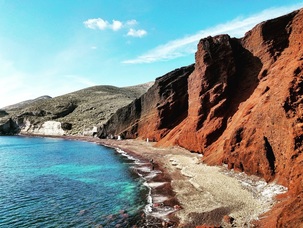 2. RED BEACH Red Beach is one of the most beautiful beaches on Santorini, and definitely the most unique. Close to the archaeological site of Akrotiri, and featuring shockingly red volcanic rocks and sand, it requires a short, rough hike to access. We parked in a dusty parking lot and headed down the short trail, stopping to take in views of Red Beach's sweeping crescent-shaped cliffs. While short, sturdy shoes are recommended for this hike due to a significant amount of scrambling over large rocks. My friend Sally wore flip-flops, and her feet paid the price. Once we reached the beach itself, we were taken aback by the blaze of color that filled our eyes. We investigated some interesting dwellings built directly into the stunning red cliffs behind the beach, and walked the short length of the beach with red sand between our toes as aquamarine waves crashed at our feet. Don't let the lack of length of this hike make you doubt its worth. The views are unreal, and your soul won't be disappointed. 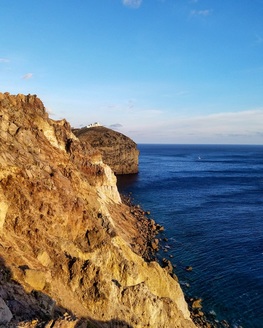 3. AKROTIRI LIGHTHOUSE While reaching Santorini's famed Akrotiri Lighthouse is a matter of walking a few steps from your car, the hike begins where the lighthouse ends. Akrotiri Lighthouse was built in 1892, and lies on the southwestern tip of the island of Thira. It's active to this day, and is a worthy destination in its own right. Below the lighthouse lies a series of rough trails and rock scrambles which lead you directly to the ocean over 200 vertical feet below. In my opinion, this hike is second only to Oia when it comes to the best sunset views on Santorini. We drove to the lighthouse some 30 minutes before sunset, pausing on the rocks below the lighthouse to take pictures in the strong breeze. From there, I left my friends and scrambled down towards the ocean and the setting sun. The wind whipped my hair around as I found my way down the rough, loose slope towards a cove below. The noise of the pounding surf grew louder and louder, and after one particularly sketchy scramble next to a cliff, I reached the final slope and made my way carefully to the water's edge as the sun dipped below the horizon. I had the place to myself. Wind, water, rock. I felt alive. This dramatic place is not on most tourists' radars, but I highly recommend it. For the fit, the descent to the ocean will only take about 15 to 20 minutes, but exercise caution, as many of the rocks are loose, and several portions of the trail require some minor scrambling skills and skirt substantial cliffs. Don't venture too far to either side of the obvious ridge that leads to the ocean. Do this hike around sunset, and make sure you have a flashlight or flashlight app for the trek back to your car. IN CONCLUSION... Heading to Santorini? Bring your hiking boots. These three hikes are all short, sweet, and feature incredible payoffs. The trails are calling, and you must go.  Not all Fourteeners are created equal. For the uninitiated, a Fourteener is a mountain over 14,000' in elevation. Colorado has 54 of them (or 53, or 55, depending on whose criteria you subscribe to). I've climbed 47 of them. I'm trying to climb them all. A couple weeks ago, I flew out to attempt North Maroon Peak, meeting up with my dad, who lives in Michigan, and his friend Dan from Fort Collins, Colorado. Located in the Elk Mountains near Aspen, Colorado, North Maroon Peak, along with its sister summit, South Maroon Peak, is one of the most photographed and picturesque mountains on the planet, framed perfectly by a symmetrical valley when viewed from the easily-accessible Maroon Lake. It's easy to photograph, but not so easy to climb. Its combination of loose, rotten rock, exposed ledges, and difficult, class 4 climbing have put it high on most lists of the most difficult Fourteeners in Colorado. The Maroon Bells have killed over 50 people over the years. Since we weren't interested in becoming statistics at this particular juncture, we took every precaution possible while preparing for the climb. Every precaution, it turns out, except for bringing adequate snow and ice climbing gear. Since we were climbing in late September, we figured that any snow we might encounter on the summit ridges would be a mere dusting. Powdery. Easy to navigate. We were wrong. After a short, restless night's sleep, we woke up at 2 AM on Sunday morning, and drove to the trailhead, leaving our car by 3:30 AM. We hiked the first two miles of well-established trail by the light of our headlamps, stopping to take pictures of the first rays of sunlight hitting North Maroon's ruddy, towering slopes above. The standard route up North Maroon, the Northeast Ridge, is one of the most direct routes on any Fourteener. In fact, you can see most of the route from Maroon Lake, as it climbs and traverses the seemingly impossible-looking face rearing up directly above Crater Lake. We knew what we were in for. A couple of fat, brazen marmots eyeballed me as I climbed by. They looked hungry. I looked delicious. I hurried. Sunlight hit as we finished crossing a large rock glacier around 11,500'. We traversed a mildly exposed ledge system to reach North Maroon's east face in earnest. We climbed the first of two large gullies on this route, traversed another tiny ledge to reach the second, steeper gully, and began to see patches of snow among the rocks. We stopped to ponder our future, and drink in the majestic views of Pyramid Peak and Maroon Lake. Oh, and to catch our collective breath. We reached the top of the second gully, and the snow began in earnest. Simply bringing along crampons and ice axes would have made the rest of the climb a cakewalk. However, we'd placed too much faith in trip and weather reports, and found ourselves unprepared at 13,200' on North Maroon's northeast ridge, with 2,000' of cliffs below us awaiting any missteps. Mom, if you're reading this, none of this actually happened. We spent the whole day in utter safety, hiking through flowery meadows. With every step, we dug in our boots to the ice-crusted snow, and tested every handhold on North Maroon's notoriously rotten rock. Soon, we arrived at the crux of the route, a Class 4, 40-foot chimney that allowed access through a large cliff band at 13,600'. This chimney is tough enough as it is when the rock is dry, but since the cleft itself lay in the shade offered by North Maroon's summit, we found that every would-be handhold in the chimney was completely covered with slippery, rock-hard ice. Needless to say, this made climbing it somewhat of an exercise in desperately wriggling up between two rock walls, using chimneying rather than climbing techniques. There was nothing sexy about this part of the climb. The final move at the top of the chimney took each of us over five harrowing minutes to complete, with the gaping maw of North Maroon's north face beneath us beckoning us to slip. 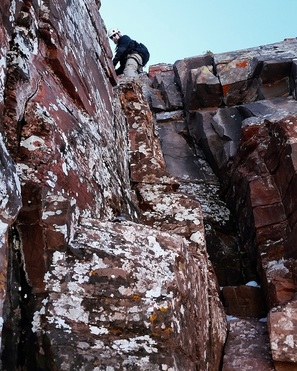 Once safely past the chimney, the difficulties lessened, yet the dangers increased. Slowly, carefully, we made our way up broken Class 3 ledges and snow-covered rocks along the left side of the ridge crest to North Maroon's coveted summit. We said a prayer of thanks, snapped some pictures, ate some food. I, of course, posed for my requisite shirtless summit shot. Sadly, we couldn't find North Maroon's summit log book. The way down proved even more time-consuming, as we crab-walked much of the icy ridge, keeping three points of contact with the ground as often as possible. Finally, fifteen hours after we started our climb, we arrived back at tourist-infested Maroon Lake, sweaty, dirty, and exhausted, and paused to snap a few final pictures of the behemoth we'd just summited amidst the hordes of camera-toting sightseers who were oblivious to what we'd just accomplished. Our climb of North Maroon reminded me of some valuable climbing lessons: Number One, always be prepared for anything. Never trust others' trip reports implicitly. Number Two, when in doubt, see Number One. Whether you've climbed all of Colorado's Fourteeners or are attempting just a few, it's important to respect each and every mountain you attempt. When approached with the right amount of respect and caution, North Maroon will reward you with incredible views, hair-raising traverses, and a mind-blowing summit. Climb it.  A month ago, I climbed Mt. Yoran, an extinct volcano in the heart of Central Oregon's wilderness east of Eugene. Have you climbed all the easy stuff in the Northwest? Dog Mountain, Mt. Defiance, Mt. St. Helens? Are you looking for a peak that provides a taste of what the more difficult Cascade volcanoes are like, without a lot of the danger and arduous effort? Yoran luck. In fact, Yoran idiot if you don't climb this peak. Okay, I'll stop. All puns aside, Mt. Yoran boasts scenic forests, gorgeous views of Diamond Peak and Divide Lake, and a short, sharp, exciting Class 3/4 summit scramble that flirts with significant exposure but never leaves you one mistake away from an untimely death. This eight-mile hike starts by meandering through beautiful forests for three miles, gently climbing to Divide Lake. Follow the signs for Mt. Yoran Trail (if you couldn't figure this out on your own, you might want to hire a guide). Once you've reached Divide Lake, take a minute to walk to the far side of the lake and snap a couple pictures of your stately quarry, majestically reflected in Divide Lake's green waters. Look for a climber's trail that angles towards the right side of Yoran's prominent South Gully. It's worth the extra effort required to locate this small trail, because otherwise you'll be scrambling through a steep field of scree and rubble for quite some time just to reach Yoran's South Gully. At this point, Yoran eighth of a mile from the summit, but the fun has just begun. Sorry, I promise I'll stop this time. Scramble left around a large rock outcropping into the obvious South Gully itself. Climb this class 3 gully on surprisingly solid rock, staying on the right side of the gully. I took my time here, since I was climbing solo and wasn't in the mood to become a statistic due to the rubble that remains on many of the gully's ledges. Work your way towards the obvious headwall at the top of the gully, and exit via a nifty class 4 move onto a slightly airy ledge. If you're not accustomed to exposure, take your time here, and walk to your left towards the obvious, steep rockfield just below the summit ridge. Scramble up these class 3 rocks to the ridge (don't know what these rock climbing ratings mean? Click HERE), turn right towards the higher, true summit, navigate a narrow catwalk, and you're there. Mt. Yoran's summit is, in a word, spectacular. It affords up-close-and-personal views of Diamond Peak and South Mt. Yoran, and 360-degree vistas of the Three Sisters, Mt. Jefferson, and more. Its 7,100' elevation is short by West Coast standards, but bear in mind that if transplanted, it would be the highest peak in 35 US states. In other words, you can still shamelessly brag about this summit to your friends anywhere east of the Rockies. I spent over an hour on Yoran's summit, devouring the delectable views and snapping photos. The weather was perfect, and, like a kid in a candy store, I couldn't get enough. Yes, I used my selfie stick. Yes, it was a gift. Don't hate. Though Yoran wouldn't even make the list of the tallest 50 mountains I've climbed, it will always hold a special place in my heart. Its summit was the first real summit I'd stood on since fully rupturing my Achilles 17 months ago. This mountain meant more to me than almost any other peak I'd climbed, because of what it's taken me to get back to doing what I love. So I sat, munching BBQ Cornnuts and taking it all in, so grateful for life, for grace, for every step I'd taken, and for the fact that the body heals. Finally, I retraced my steps to the top of the South Gully and carefully downclimbed it, pausing several times to admire the emerald waters of Divide Lake, seemingly directly beneath my feet. Once back on the Mt. Yoran Trail, I returned the route I'd come. A word to the wise: bring mosquito repellent on this climb. I didn't. The mosquitoes were hungry, and I was delicious. I got eaten alive, especially in some of the marshy areas towards the beginning of the hike. Anytime you can learn from your own mistakes, it's a beautiful thing. Anytime you can learn from someone else's mistakes, it's even better. You're welcome. Also, bring sunblock, plenty of water, plenty of food...you know the drill. For directions to the trailhead, click HERE. In the Pacific Northwest? Climb this mountain. As soon as possible. Yoran for a real treat. Sorry. 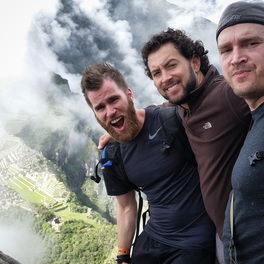 by Jon Davidson When visiting Machu Picchu, you have two choices. Either you take a guided tour, mill around with a bunch of obese tourists, and snap some photos. Or, you climb some stuff. Like a boss. Naturally, we chose the latter when three of my friends and I visited this Wonder Of The World on April 13, 2015. We'd already dropped the ball on doing a four-day trek to Machu Picchu via the Inca Trail. Unbeknownst to us, daily permits are capped at low numbers and sell out upwards of a year in advance. The two-day trek seemed too puny, and time constraints prohibited us from choosing a lengthier trek option, such as the 5-day Salkantay route. So, instead, we decided to maximize our time at Machu Picchu, hiking everything we possibly could. We reserved permits to climb Huayna Picchu, the prominent, conical, 8,920' mountain directly behind the Inca ruins in almost everybody's classic photograph. We researched other hikes in the park, and settled on the Inca Bridge and Sun Gate hikes. We planned on hiking more in one day than all the other scrubs would throughout their meticulously planned four-day treks. 5 o'clock came early the morning of the 13th. Our multiple alarms sounded, and wake-up calls rang, shaking us out of our Pisco-induced slumber. We grabbed a bus to Machu Picchu, which careened up a winding, one-lane dirt road perched precariously above thousand-foot drops on the Andes mountainsides. Upon arrival, we were disappointed to find that the entire park and outline of Huayna Picchu were completely encased in fog. We'd chosen to visit at the start of the rainy season, as it was the only time that all four of our respective schedules would allow. Grown-ups and their stupid jobs. Still, in the clouds, we were blown away with the immensity and grandeur of Machu Picchu as we briskly walked from one end of the park to the other to get to the Huayna Picchu gate and trailhead. We waited in line, showed our Huayna permits, and started up the trail. Huayna Picchu's trail wastes no time in introducing itself. Dubbed the "Hike Of Death," it has claimed a few lives, and made Outside Magazine's list of the 20 most dangerous hikes in the world, but isn't as deadly as its reputation implies. It's important to come prepared with sturdy hiking boots, water, and a general sense of badassery. From Machu Picchu, the imposing peak looks more difficult than it actually is, thanks to a clever Inca trail replete with steps that clings to the side of sheer cliffs. Huayna is climbable for fit tourists, and while you will need to use both hands and feet at times, you don't actually need any climbing experience, thanks to cables and the occasional fixed rope. Having said that, the climb gains almost 1,200 feet in less than a mile, so a functional cardiovascular system is a must, as is a lack of a fear of heights. This is a particularly bad place to discover that you have vertigo, or to discover that you have food poisoning, as my friend Tony did. I'll spare you the gory details on that front. First, steps led down into the pass between Machu Picchu and Huayna Picchu. The trail leveled out briefly, and boasted some great viewpoints of the Andes cordillera across the valley. Once down in the pass, we quickly realized that the introduction was over. From here, an unrelenting assault of thousands of steps led directly up an exposed ridge, with a 500-foot cliff on one side. Still slippery from rainfall the night before, the steps were uneven yet solid, leading us ever upward into the fog. Huayna Picchu permits are capped at 400 a day, but still the trail felt crowded at times, as we had to perch on the occasional cliffside to let a hiker traveling in the opposite direction pass. 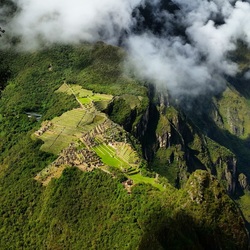 Soon, we reached the lowest terraces on Huayna Picchu's slopes, terraces that stretched all the way to the high priest's residence that, according to local folklore, once stood on the summit. After squeezing through a narrow, muddy, cavelike tunnel in the darkness, and climbing up several unbelievably narrow staircases, we arrived at Huayna Picchu's rocky summit. From there, we were afforded an insane bird's-eye view of Machu Picchu over a thousand feet below. As the clouds cleared, more and more Inca ruins came into view. This would have been a majestic, contemplative moment, had we not been sharing the summit with over a hundred other tourists, many of whom were yelling and giggling and snapping selfies like they were going out of style. Either way, Huayna Picchu's summit afforded a once-in-a-lifetime view. After taking it all in, we started back down the winding staircase, stopping briefly to scramble up Huchuy Picchu, the undersized, underappreciated, yet frequently photographed mound in between Huayna and Machu. A 15-minute detour, it afforded views of Machu and Huayna, and gave us perspective on the climb we'd just accomplished (and lived to tell about). Arriving back at the Huayna Picchu gates about an hour after we were supposed to meet our Machu Picchu tour guide, we set off to find him and to further explore one of the wonders of the world. If you're visiting this hike, climbing Huayna Picchu or Machu Picchu Mountain is a must. Make it happen. For more information on Huayna Picchu permits, click here. |
AuthorWrite something about yourself. No need to be fancy, just an overview. Archives
May 2017
Categories |
 RSS Feed